docker volume create rag-data6 Retrieval Augmented Generation (RAG)
6.1 Create a Large Language Model Cluster
6.1.1 Create the RAG Container
- Create a volume called
rag-data.
- Create the container with the
ragengine in the folliwng way. The software is documented here.
docker run -d -p 9099:9099 --add-host=host.docker.internal:host-gateway --platform linux/amd64 -v rag-data:/app/pipelines --network workshop_network --name rag --hostname rag --restart always jcppc/tecweb2025-rag:latest6.1.2 Configure RAG
Access the WebUI and configure the LLM to use RAG http://localhost:3000.
Follow these steps:
- You should have the following screen or very similar.

- Navigate to the
Admin Panel>Settings>Connectionssection in the top right side of Open WebUI.


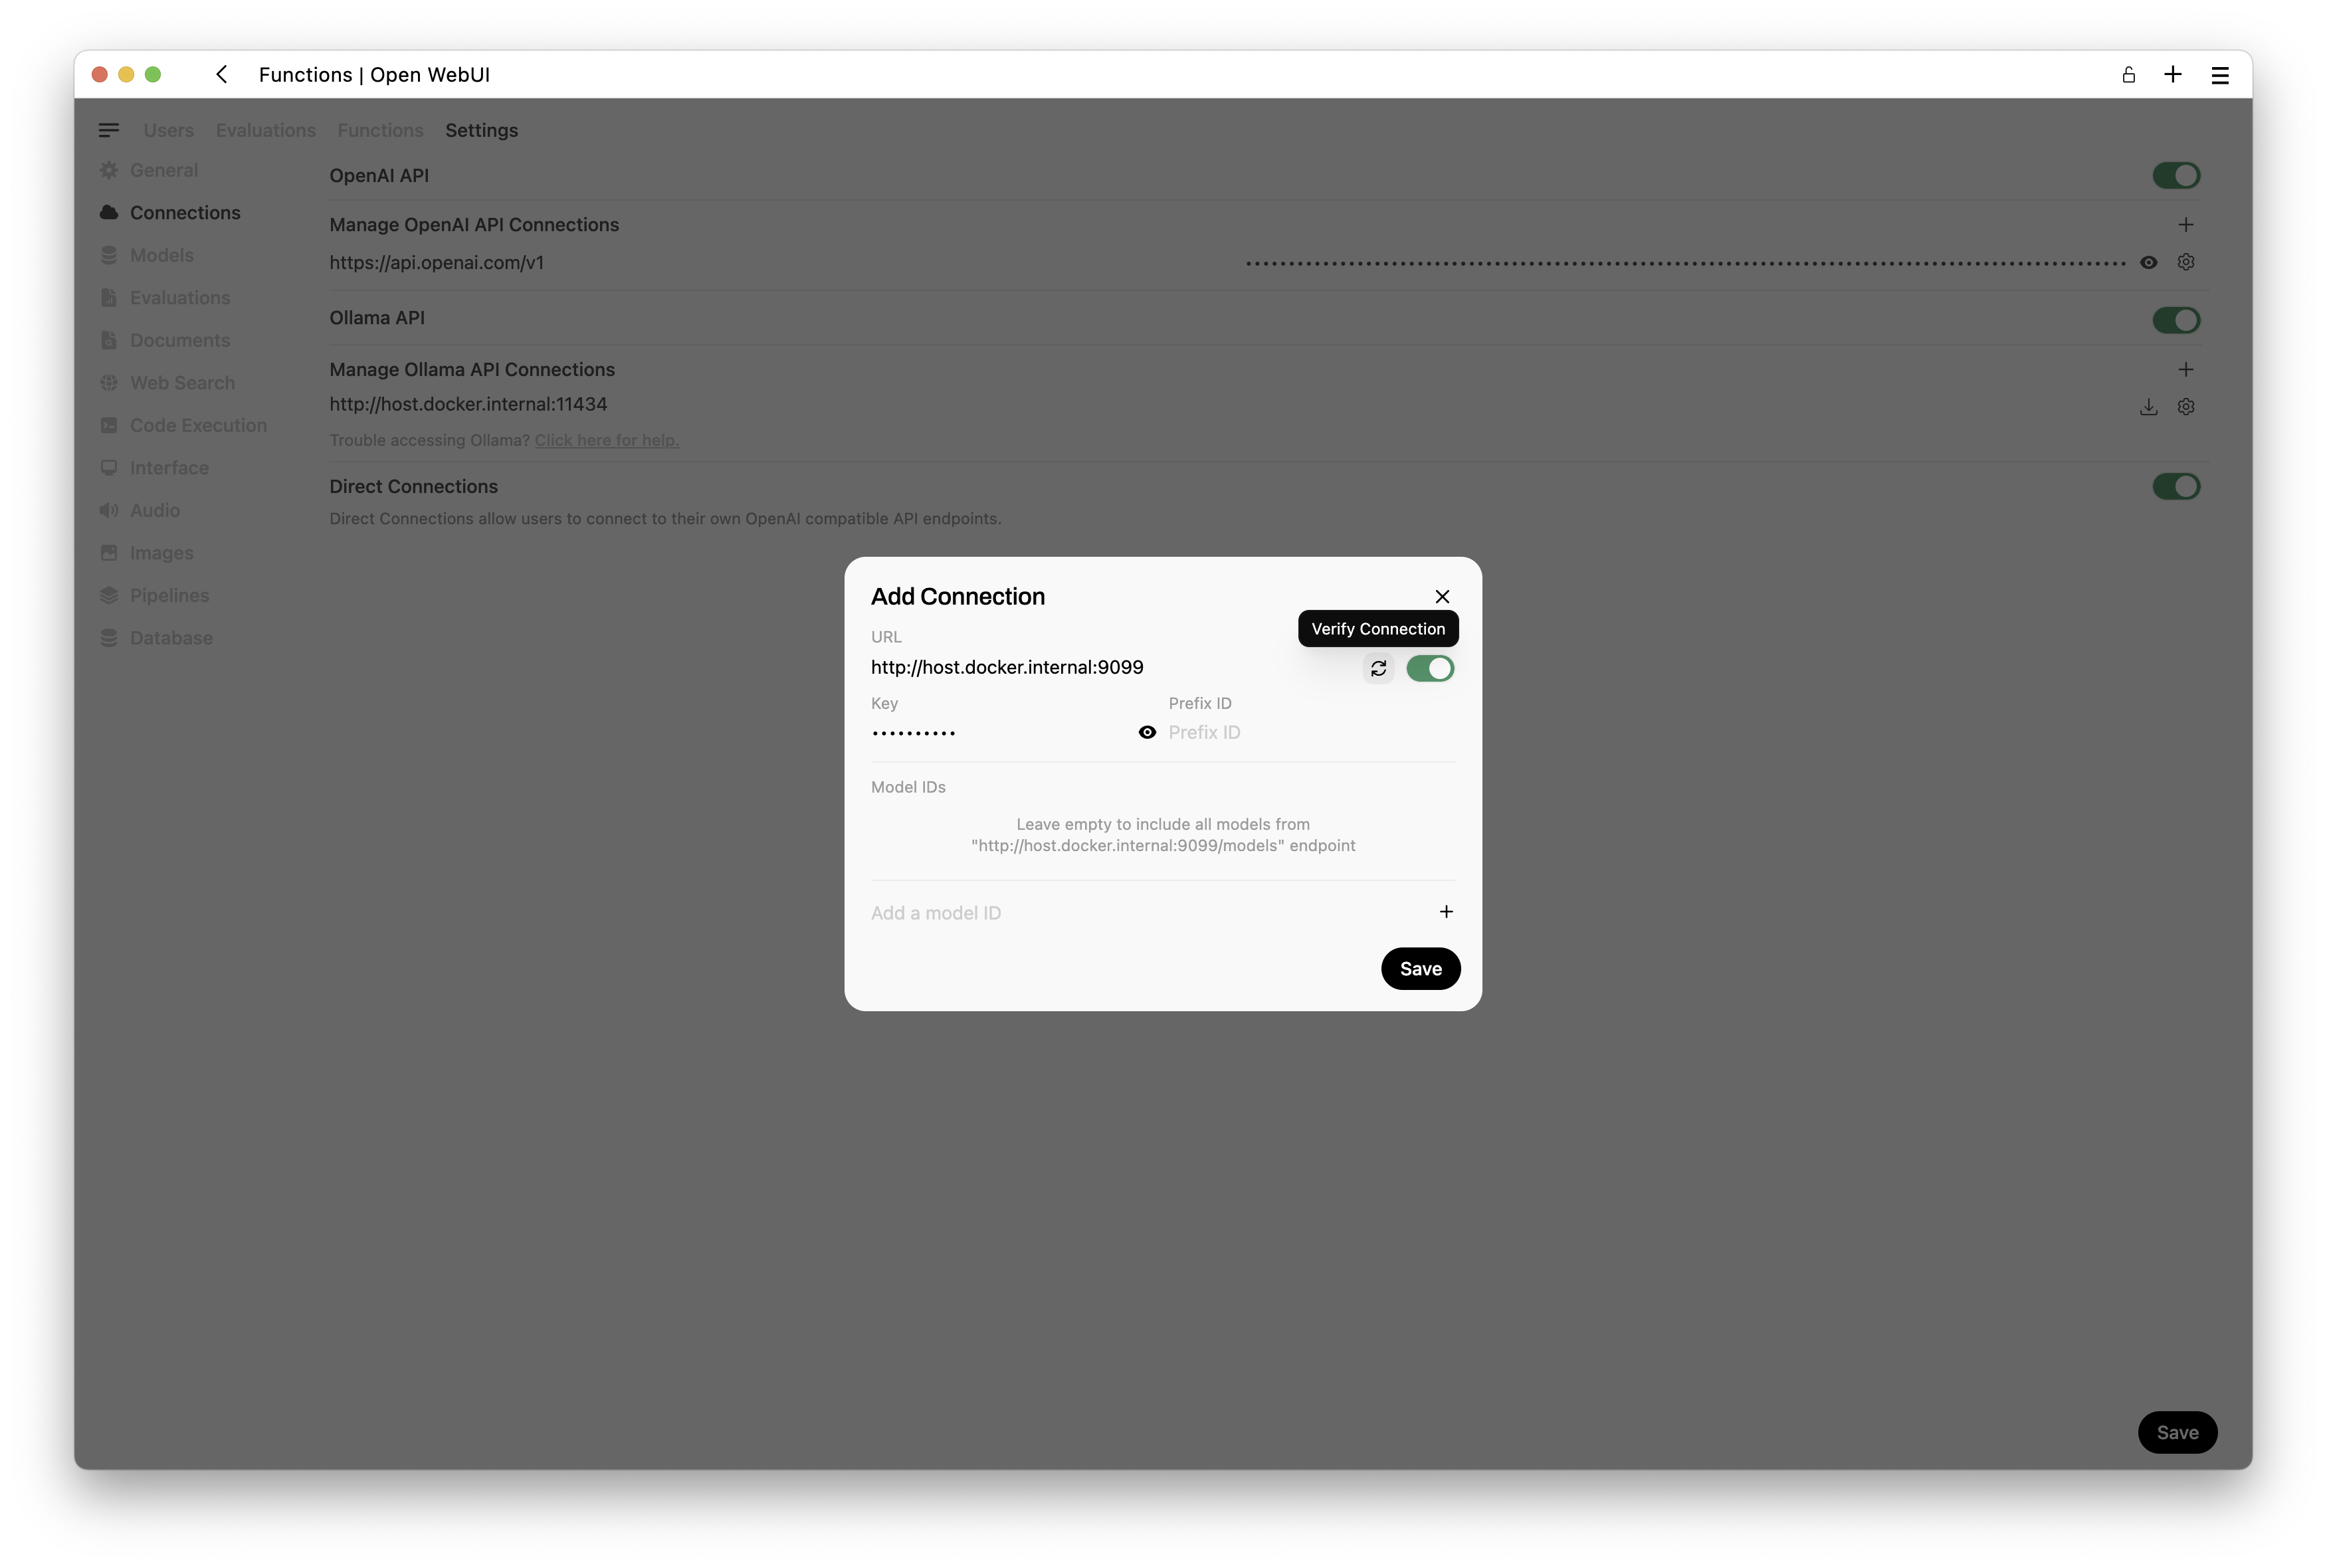
- When you’re on this page, you can press the + button to add another connection.


Set the API URL to
http://host.docker.internal:9099and the API key to0p3n-w3bu!.Verify your connection.
Once you’ve added your pipelines connection and verified it, you will see a screen similar to this one.

Navigate to the
Admin Panel>Settings>Pipelinessection in Open WebUI.You should have a screen similar to this one.

Download the RAG pipeline file from here. The pipeline file it is already prepared with the code for this workshop.
Uncompress the file and select it to the Open WebUI interface.
Press the
uploadbutton on the right side of the panel.


- You should see a screen like the following.
Important
If you don’t see a screen like the following, run the following commands:
docker exec -it rag /bin/bash
pip install -r requirements.txt
Exit and restart the
ragcontainer and go back to the same steps.Uncompress the file and select it to the Open WebUI interface.
Press the
uploadbutton on the right side of the panel.

If you want to use Ollama models, change ChatGPT Key field from
CustomtoNoneand enter an existing Ollama model name (should be download first in the LLMs container) in the fieldText to SQL Model.If you want to use ChatGPT integration, keep the field as
Customand enter a ChatGPT Key and a OpenAI model in the fieldText to SQL Model.Add a
ChatGPT Key, similar to this one, in the last field of the form.
Important
This ChatGpt Key is no longer valid. It’s used here only as an example.
sk-proj-XlXRiWlfetudLBrRrP6B4C_RRjDpJu03LJ9smXeDz3p-gE7PLg-a1Td6qFCWoydnIL2pxhJL6dT3BlbkFJ5B2uPress the button
Saveat the bottom of the screen.Restart the
rag(pipelines) container inDocker.Connect to your
ragcontainer with this command:
docker exec -it rag /bin/bash- Once inside the
ragcontainer run the following command to install missing libraries.
pip install -r requirements.txtExit and restart the
ragcontainer.At the end of installation, your
Dockershould look like this.

- Access again your main WebUI console and select the
Model>Tecweb2025.

- You can set this as your
default modelif you wish.

- Start to ask questions.

Congratulations
You are now using LLMs & RAG to run queries on databases.